Dreams Really Do Come True in a Strapless Basket Weave Dress..
Hey Everyone..
I'm back with another nail biting tale of,
"Tanielle, Tortures herself with another Technical Dress".
Well to my standards, it's complicated. Here's the story, I'm on Pinterest as usual looking through Ankara dresses and she happen to catch my eye. I knew that there was no way in the hell that I
could pull this off, too intricate for me. I had no time nor the inclination to make her and all of her straps, LOL.
I purchased the fabric from Fabric.com for about $5 per yard because it was a great price and I put her up for a future project such as a top or pant. Well going on about my business for day to day, I kept thinking and dreaming of the inspiration dress. I told myself, nope, don't do it, reconsider, read some litera-ture. Sorry, that's Outkast in my head, so that's exactly what I did.
But I had to give a her a try..
Here she is...

Soo Proud To Finally Have Her On!!!!!

My Inspiration Pic..
I found this on Pinterest..

I left the fabric alone for another week or two then came across a much more simpler basket weave technique. The first thing was cutting the straps, I cut 20, 2x8 inch straps and 5, 2x23 inch straps.
Folded fabric in 4, ironed and stitched them close.

This is the example of pattern that I'll be creating at the bottom of the dress.
Please excuse the burn makers on the ironing, we burn around these parts.. LOL

I used bodice only of Simplicity 1607, no straps or you can use a strapless bodice of your choice.
I love the coverage of this one and use any pencil skirt pattern for the bottom.

Cutting everything out and sewing bodice lining together.
I'll spare you the boring stuff.
All Done..

Should I or Shouldn't I add boning.
Scared to death but I'm game if you are.

First time adding boning..
I watched about 10 YT videos on boning just to make sure I was getting it right..
All of the tips and tricks really came through for me.

A really good tip was to round off the top of boning with nail file and always add a tab of fabric to prevent it from poking you.
Took plastic out of casing and place casing on seam of bodice lining, slowly sewing along the pre-stitch casing on both sides

Slowly added plastic back in casing and sewed bottom.

I also added boning to front seams, chile' I was on a roll, LOL..

Bammm!!!

Even added it to the back of the bodice..
Look, I think I'm grown...

/
Connected lining and front bodice then attached skirt to bottom of bodice.
Done..

Inside of dress.

Closer Look..

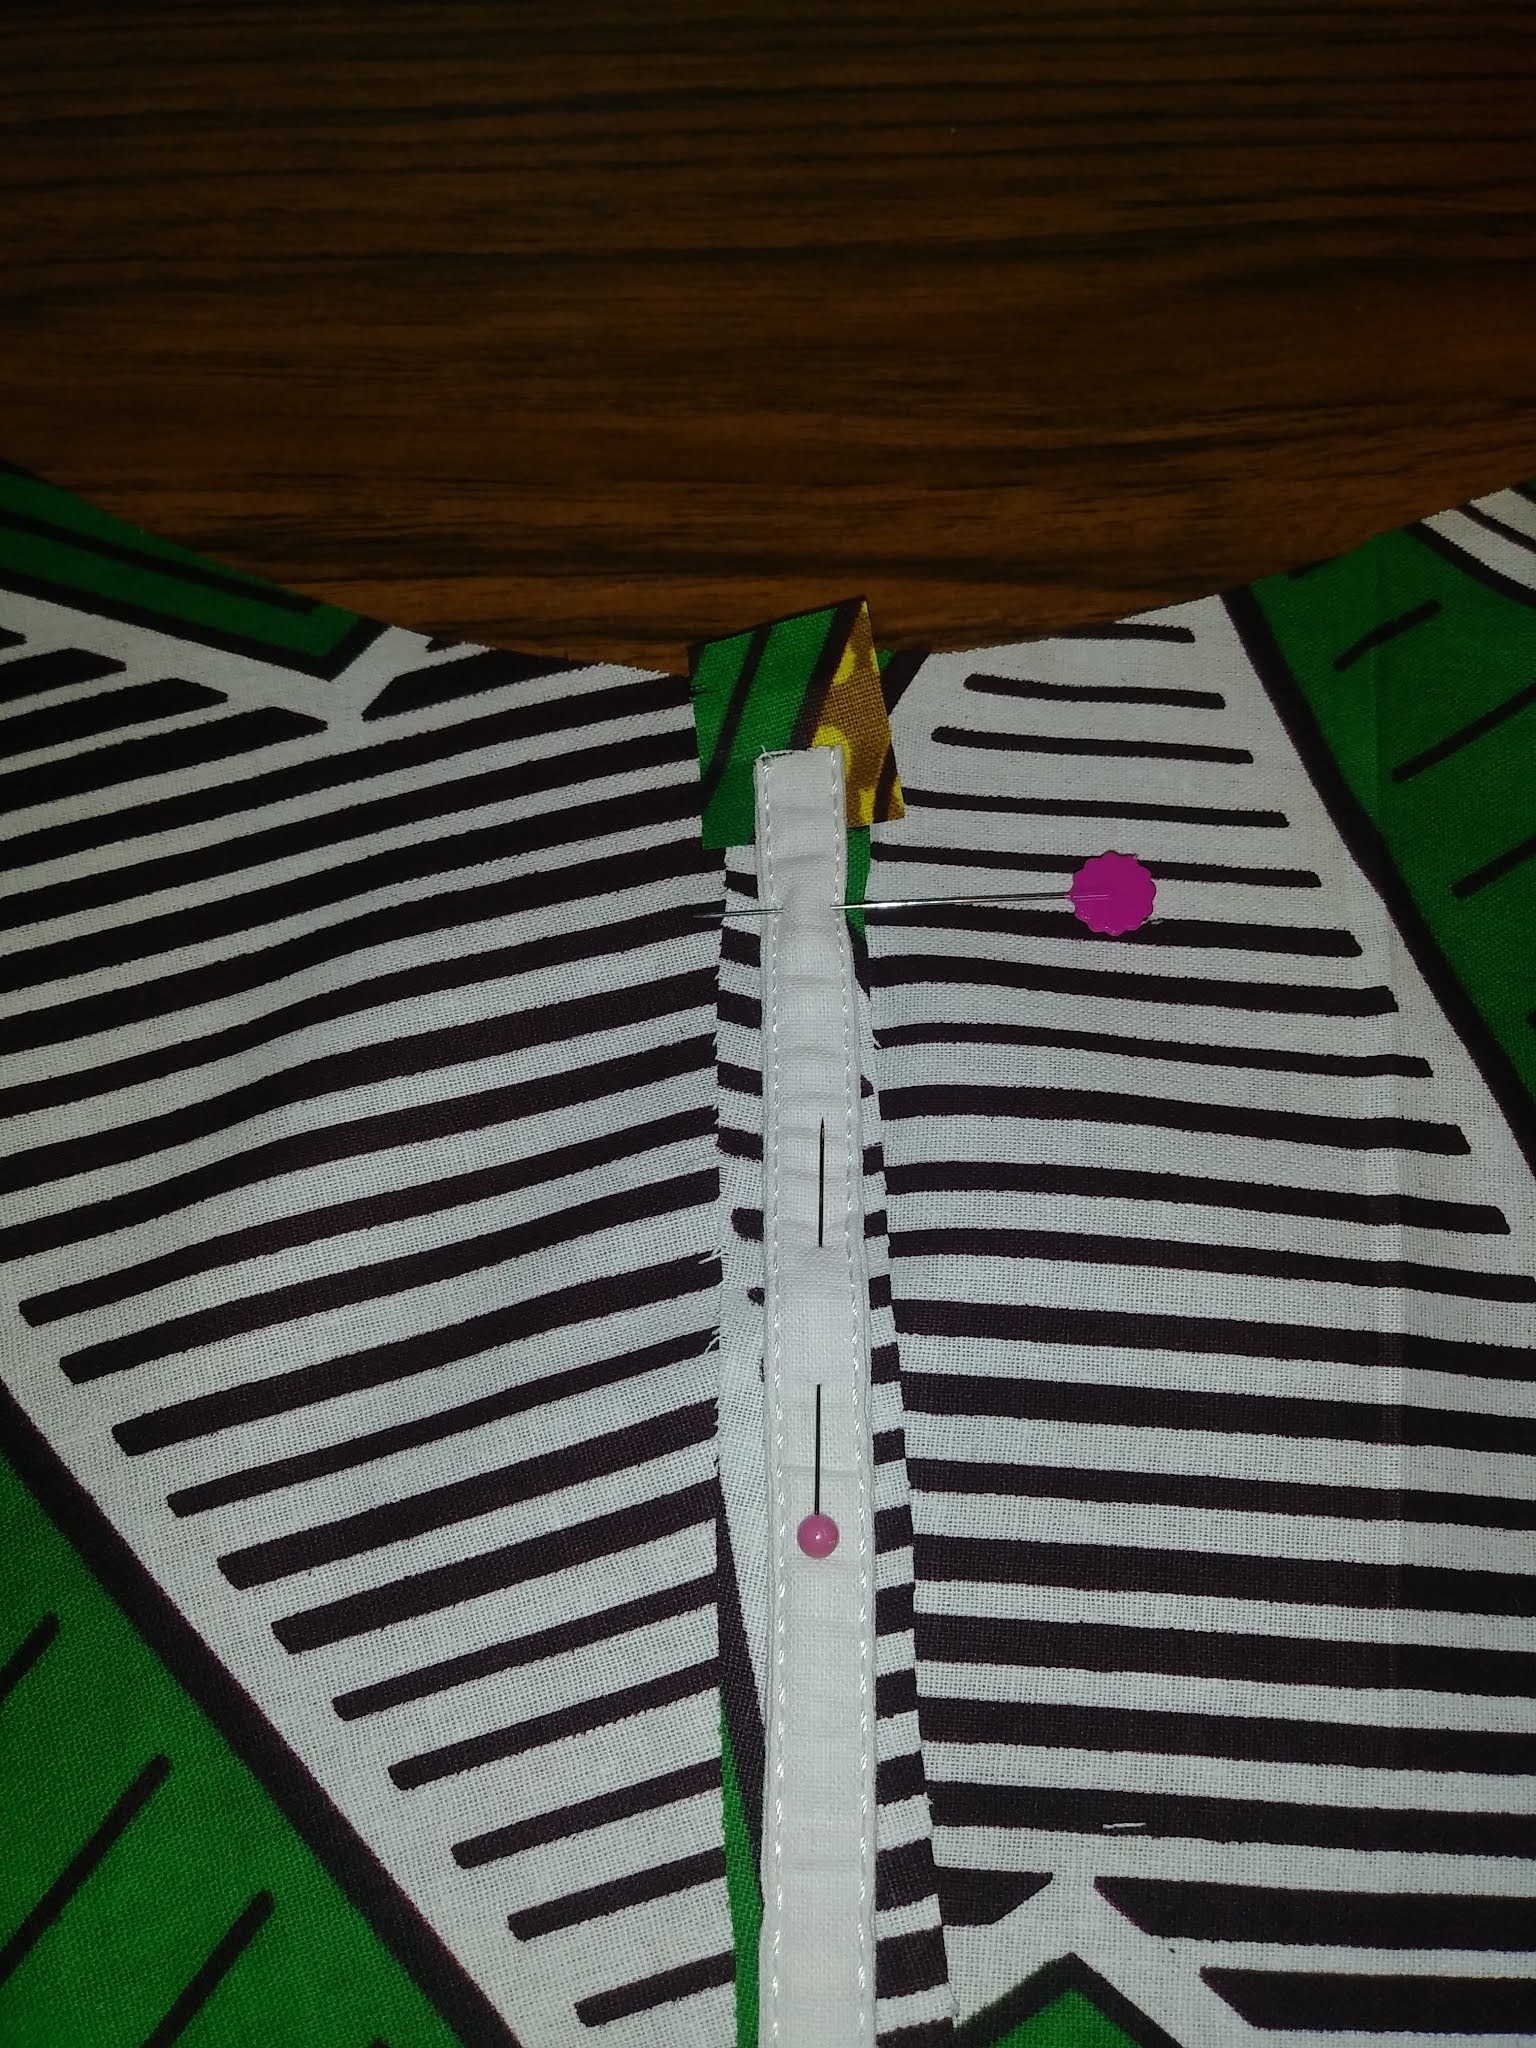
Added zipper to back of dress.

I grading the hip to the bottom about 2 inches for a more hour glass shape, then used my serger to lock that stitch in.

At the beginning, I put in a picture of the basket weave technique that I'll be trying.
Well, wish me luck.
Sewed a stay-stitch around the bottom of dress.
Add straps vertically around dress.
I spaced my straps about 2 inches apart, then sew.

After sewn, I took a longer strap and weaved it around the dress horizontally.
Sew around both bottom and top of straps.
Sew as many as you like, I choose horizontal 3 straps.

I also added another piece of 4 inch fabric to finish the dress.
I know that the bottom isn't centered, that was all the fabric I had left.

Back View

Closer look of back

Her again..

Soo Proud of Myself..
I really hope you like her as much as I do..
She was definitely a labor of love.
I always tell myself, just try it because you never know how it will turn out and she turned out fabulous. I'll take pictures in her as soon as get settled in my new place.
If you have any questions.
Please Comment, Share and Subscribe to my blog..
A little sneak preview of my next project..
See you soon....

Until Next Time....
SEW IT CHIC'!!!!!
way to go don't you love it when and idea comes to life!!!
ReplyDelete